


Are you struggling to keep your floor scrubber in top condition? Cleaning and maintaining these powerful machines is essential for ensuring optimal performance, cost savings, and a hygienic environment. In this comprehensive guide, you’ll learn the importance of regular scrubber maintenance and discover a step-by-step process for thoroughly cleaning every component. We’ll provide a detailed maintenance checklist, covering daily, weekly, and monthly tasks. Additionally, you’ll find troubleshooting tips for common issues like clogged drains, worn brushes, and poor cleaning results. Follow our expert advice to maximize your floor scrubber’s lifespan and efficiency.
Why is it Important to Clean a Floor Scrubber?
Floor scrubbers are essential for maintaining clean and hygienic floors in commercial and industrial settings. However, like any machinery, they require regular cleaning and maintenance to ensure optimal performance, longevity, and hygiene. Neglecting to clean and maintain your floor scrubber can lead to issues such as decreased cleaning efficiency, clogged components, bacterial growth, and premature wear and tear.
Regularly cleaning your floor scrubber offers several important benefits:
- Improved Cleaning Performance: Over time, dirt, grime, and chemical buildup can accumulate in various parts of the scrubber, affecting its ability to clean effectively. Proper cleaning removes these contaminants, ensuring that the machine operates at peak performance levels.
- Extended Lifespan: Routine cleaning and maintenance help prevent excessive wear and tear on the scrubber’s components, such as brushes, squeegees, and tanks. By addressing issues promptly, you can extend the machine’s lifespan and reduce the need for costly repairs or replacements.
- Hygiene and Safety: Floor scrubbers are used to clean surfaces where people walk, making hygiene a critical concern. Thoroughly cleaning the machine helps prevent the spread of bacteria, viruses, and other pathogens, ensuring a safe and healthy environment for building occupants.
- Cost Savings: Proper maintenance can help you avoid expensive repairs or premature replacement of the floor scrubber. Additionally, a well-maintained machine operates more efficiently, potentially reducing water, chemical, and energy consumption, leading to cost savings in the long run.
By understanding the importance of cleaning and maintaining your floor scrubber, you can ensure that it continues to provide optimal cleaning performance, while also protecting your investment and promoting a safe and hygienic environment.
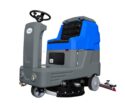
When considering how to clean a floor scrubber, it’s crucial to understand its weight distribution.
Step-by-Step Process for Cleaning Floor Scrubbers
Cleaning a floor scrubber is a multi-step process that involves thoroughly cleaning various machine components. Follow these steps to ensure a comprehensive cleaning:
Preparing for Cleaning
- Disconnect the scrubber from its power source (battery or cord).
- Move the machine to a well-ventilated area suitable for cleaning.
- Gather the necessary cleaning supplies, such as a mild detergent, brushes, rags, and personal protective equipment (PPE) like gloves and goggles.
Cleaning the Solution Tank
- Drain any remaining cleaning solution from the tank.
- Remove the tank and rinse it thoroughly with clean water.
- Use a mild detergent and a soft-bristle brush to scrub the interior of the tank, removing any buildup or residue.
- Rinse the tank thoroughly and allow it to air dry completely before reassembling.
Cleaning the Recovery Tank
- Drain the recovery tank, disposing of the dirty water properly.
- Remove the tank and rinse it with clean water.
- Use a mild detergent and a soft-bristle brush to scrub the interior of the tank, paying special attention to any crevices or corners where debris may accumulate.
- Rinse the tank thoroughly and allow it to air dry completely before reassembling.
Cleaning the Brushes or Pads
- Remove the brushes or pads from the scrubber.
- Rinse them under running water to remove any loose debris or buildup.
- Scrub the brushes or pads with a mild detergent and a soft-bristle brush, ensuring that all grooves and crevices are cleaned.
- Rinse the brushes or pads thoroughly and allow them to air dry completely before reinstalling.
Cleaning the Squeegees
- Remove the squeegees from the scrubber.
- Rinse them under running water to remove any loose debris or buildup.
- Scrub the squeegees with a mild detergent and a soft-bristle brush, paying special attention to the edges and any grooves.
- Rinse the squeegees thoroughly and allow them to air dry completely before reinstalling.
Cleaning the Exterior
- Use a damp cloth or mild detergent solution to wipe down the exterior of the scrubber, including the control panel, handles, and any other exposed surfaces.
- Dry the exterior with a clean cloth or allow it to air dry completely.
Remember to follow the manufacturer’s instructions and recommendations for cleaning and maintaining your specific floor scrubber model. Additionally, always use appropriate personal protective equipment (PPE) and dispose of any waste or dirty water properly.
Discovering how to clean a floor scrubber involves knowing common failure reasons and prevention methods.
Routine Maintenance Checklist for Floor Scrubbers
In addition to thorough cleaning, regular maintenance is crucial for ensuring the longevity and optimal performance of your floor scrubber. Here’s a comprehensive checklist of routine maintenance tasks:
Daily Maintenance Tasks
- Check and clean the squeegees for any debris or damage.
- Inspect the brushes or pads for wear or damage, and replace them if necessary.
- Check the solution and recovery tanks for any leaks or cracks.
- Ensure that all filters are clean and in good condition.
- Clean the exterior of the scrubber to remove any dirt or debris.
Weekly Maintenance Tasks
- Drain and rinse the solution and recovery tanks.
- Clean the brushes or pads thoroughly.
- Check the battery levels (if applicable) and ensure proper charging.
- Inspect the squeegee blades for wear and replace them if necessary.
- Check the hoses and connections for any leaks or damage.
Monthly Maintenance Tasks
- Perform a deep cleaning of the solution and recovery tanks.
- Inspect the machine for any loose or worn parts and tighten or replace them as needed.
- Check the condition of the tires or wheels and ensure proper inflation (if applicable).
- Test the machine’s controls and switches for proper operation.
- Check the manufacturer’s recommended service intervals and schedule any necessary maintenance or repairs.
By following this routine maintenance checklist, you can ensure that your floor scrubber remains in top condition, operates efficiently, and provides consistent cleaning performance over its lifespan.
Troubleshooting and Fixing Common Floor Scrubber Problems
Despite regular cleaning and maintenance, floor scrubbers can sometimes encounter issues that affect their performance. Here are some common problems and troubleshooting tips:
Clogged Drains or Hoses
- Check for any visible debris or buildup in the drains or hoses.
- Use a plunger or compressed air to dislodge any blockages.
- Disassemble and clean the hoses and drains if necessary.
Worn or Damaged Brushes or Pads
- Inspect the brushes or pads for excessive wear, fraying, or damage.
- Replace worn or damaged brushes or pads as needed.
- Ensure proper brush or pad pressure and alignment.
Leaks in the Tanks or Squeegee System
- Check for any cracks, holes, or loose connections in the tanks or squeegee system.
- Tighten any loose fittings or connections.
- Replace any cracked or damaged components.
Electrical or Battery Issues
- Check the battery levels and ensure proper charging (if applicable).
- Inspect the electrical connections and wiring for any damage or corrosion.
- Consult the manufacturer’s manual for troubleshooting electrical or battery-related issues.
Poor Cleaning Performance
- Ensure that the solution and recovery tanks are clean and filled with the correct cleaning solution and water ratio.
- Check the brush or pad pressure and adjust if necessary.
- Inspect the squeegees for proper alignment and replace them if worn or damaged.
- Adjust the solution flow rate or brush speed as recommended by the manufacturer.
If you encounter any issues that you cannot resolve or if the problem persists, it’s recommended to consult with a professional technician or the manufacturer’s service centre for further assistance.
By following the cleaning and maintenance guidelines outlined in this guide, and addressing any issues promptly, you can ensure that your floor scrubber continues to provide optimal cleaning performance and long, reliable service life.
Key Takeaways
- Regularly cleaning and maintaining floor scrubbers is crucial for ensuring optimal performance, extended lifespan, and maintaining hygiene and safety standards in commercial and industrial settings.
- The step-by-step cleaning process involves thoroughly cleaning various components of the floor scrubber, including the solution tank, recovery tank, brushes or pads, squeegees, and exterior.
- A comprehensive routine maintenance checklist outlines daily, weekly, and monthly tasks to keep the floor scrubber in top condition, such as inspecting filters, checking battery levels, and tightening loose parts.
- Common floor scrubber problems include clogged drains or hoses, worn or damaged brushes/pads, leaks in tanks or squeegee systems, electrical or battery issues, and poor cleaning performance.
- Troubleshooting tips are provided for addressing these common issues, such as dislodging blockages, replacing worn components, tightening connections, and adjusting settings like solution flow rate or brush pressure.
- Proper cleaning and maintenance can extend the lifespan of a floor scrubber, improve cleaning efficiency, promote hygiene, and ultimately lead to cost savings by reducing the need for costly repairs or premature replacements.
- Following the manufacturer’s instructions, using appropriate personal protective equipment (PPE), and seeking professional assistance when needed are essential for safe and effective floor scrubber cleaning and maintenance.
FAQs
Q: How often should I replace the brushes or pads on my floor scrubber?
A: The frequency of brush or pad replacement depends on several factors, including the type of flooring, the amount of usage, and the manufacturer’s recommendations. As a general guideline, most brushes or pads should be replaced every 3-6 months, or sooner if they show signs of excessive wear, fraying, or damage.
Q: My floor scrubber is leaving streaks or water trails behind. What could be causing this?
A: Streaking or water trails can be caused by several issues, such as worn or misaligned squeegees, incorrect solution levels, or clogged solution lines or nozzles. Start by inspecting and cleaning the squeegees, ensuring they are properly aligned and in good condition. Also, check the solution levels and flow rate, and clear any clogs in the solution lines or nozzles.
Q: The recovery tank on my floor scrubber has an unpleasant odor. How can I eliminate this?
A: Unpleasant odors in the recovery tank are often caused by bacterial growth or chemical buildup. To eliminate these odors, perform a deep cleaning of the recovery tank using a mild detergent or a diluted bleach solution. Additionally, ensure that the tank is completely drained and dried after each use to prevent moisture buildup and bacterial growth.
Q: My floor scrubber is not picking up water or leaving the floor wet. What could be the issue?
A: This problem could be caused by a clogged vacuum hose, a malfunctioning vacuum motor, or worn or damaged squeegees. Start by checking the vacuum hose for any blockages and clearing them if necessary. If the hose is clear, inspect the squeegees for wear or damage and replace them if needed. If the issue persists, the vacuum motor may need to be serviced or replaced.
Q: The brushes on my floor scrubber are not spinning or are spinning unevenly. What should I do?
A: Uneven or non-spinning brushes can be caused by several issues, including debris caught in the brush housing, a loosened brush drive belt, or a motor problem. Begin by checking for and removing any debris or buildup in the brush housing. If the issue persists, you may need to inspect and tighten or replace the brush drive belt or have the brush motor serviced by a professional.
Q: How can I extend the lifespan of my floor scrubber’s batteries?
A: To maximize the lifespan of your floor scrubber’s batteries, follow these tips:
- Avoid deep discharges by charging the batteries after each use.
- Periodically perform an equalization charge to balance the battery cells.
- Store the machine in a cool, dry environment when not in use.
- Keep the battery terminals clean and free of corrosion.
- Replace the batteries when they can no longer hold a sufficient charge.