
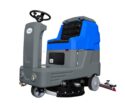


You rely on your floor scrubber to keep your facility’s floors clean and well-maintained. However, over time, the brushes on your scrubber can become worn or damaged, affecting its cleaning efficiency. Replacing these brushes is an essential maintenance task, but you may wonder, “How easy is it to replace the brushes of a floor scrubber?” This comprehensive guide is here to address your concerns. You’ll learn why regular brush replacement is crucial, the different types of brushes available, and a step-by-step process for easy brush replacement. We’ll also cover troubleshooting tips and maintenance best practices to ensure your scrubber operates at peak performance, delivering a thorough clean every time.
Key Takeaways
- Regularly replacing the brushes on your floor scrubber is essential for maintaining optimal cleaning performance, extending the machine’s lifespan, and ensuring a safe working environment.
- Understanding the different types of floor scrubber brushes (nylon, polypropylene, soft brushes, and pad drivers) is crucial for choosing the right replacement brushes for your specific needs and floor surfaces.
- Gather the necessary tools, such as replacement brushes, screwdrivers or wrenches, gloves, and cleaning supplies, before beginning the brush replacement process.
- Follow the step-by-step guide provided in the article, which includes preparing the work area, removing old brushes, cleaning the brush housing, installing new brushes, and testing the new brushes.
- Be prepared to troubleshoot common issues that may arise during brush replacement, such as brushes not spinning, uneven brush wear, or compatibility issues.
- To prolong the life of your floor scrubber brushes, implement proper maintenance practices, including regular cleaning, proper storage, and periodic inspections.
- Always consult your scrubber’s manual for specific maintenance recommendations, recommended replacement intervals, and compatible brush types.
- By following the comprehensive guide and tips provided in this article, you can confidently and quickly replace the brushes on your floor scrubber, ensuring efficient cleaning and extending the life of your valuable equipment.
Why Replace Floor Scrubber Brushes?
Regularly replacing the brushes on your floor scrubber is essential for several reasons:
- Improved Cleaning Performance: Worn or damaged brushes lose their ability to scrub and clean surfaces effectively, leaving behind dirt, grime, and other debris.
- Longer Machine Life: Continuing to use worn brushes can put additional strain on the scrubber’s motor and other components, leading to premature wear and tear.
- Cost Savings: Replacing brushes is generally more cost-effective than having to repair or replace the entire machine due to neglected maintenance.
- Safety: Worn brushes can leave floors slippery or create trip hazards, posing a risk to employees and customers.
Learn about the complete guide on how to clean a floor scrubber, including replacing the brushes easily.
Types of Floor Scrubber Brushes
Before we dive into the replacement process, it’s essential to understand the different types of floor scrubber brushes available:
- Nylon Brushes: These versatile brushes are suitable for general cleaning on various floor surfaces, including concrete, tile, and vinyl.
- Polypropylene Brushes: These brushes are designed for heavy-duty cleaning and are ideal for removing stubborn dirt and debris from rough surfaces like concrete.
- Soft Brushes: As the name suggests, these brushes are gentler and are often used for cleaning delicate surfaces like hardwood floors or polished concrete.
- Pad Drivers: Instead of bristles, pad drivers use floor pads (e.g., scrubbing pads, stripping pads) to clean and polish floors.
Knowing the type of brush or pad your scrubber requires will ensure you purchase the correct replacement.
Tools Needed for Brush Replacement
Before starting the replacement process, gather the following tools:
- Replacement brushes or pad drivers (compatible with your floor scrubber model)
- Screwdriver or wrench (if required for removing brush attachments)
- Gloves (for handling used brushes)
- Cleaning supplies (for cleaning the brush housing and surrounding area)
Discover effective floor scrubbing techniques for achieving sparkling clean floors effortlessly.
Step-by-Step Guide to Replacing Floor Scrubber Brushes
Now, let’s go through the step-by-step process of replacing the brushes on your floor scrubber:
- Prepare the Work Area: Park the floor scrubber in a well-ventilated area and turn off the machine. If applicable, unplug it or disconnect the battery.
- Remove the Old Brushes: Consult your scrubber’s manual for specific instructions on removing the brushes or pad drivers. This may involve loosening screws, releasing latches, or lifting the brush assembly out.
- Clean the Brush Housing: Use a brush or vacuum cleaner to remove any debris or buildup in the brush housing and surrounding area.
- Install the New Brushes: Carefully insert the new brushes or pad drivers into the housing, ensuring they are securely attached and aligned correctly.
- Test the New Brushes: Reconnect the power source and turn on the scrubber. Engage the brush rotation and observe if they are spinning correctly and making proper contact with the floor.
Troubleshooting Common Issues During Brush Replacement
While replacing floor scrubber brushes is generally a straightforward process, you may encounter a few common issues:
- Brushes Not Spinning: If the new brushes are not spinning, double-check that they are installed correctly and that there are no obstructions in the brush housing. Also, ensure the machine is adequately powered on and the brush engagement mechanism is working correctly.
- Uneven Brush Wear: If you notice uneven wear on the new brushes, it could indicate an issue with the brush pressure settings or an unbalanced brush assembly. Consult the manual or seek professional assistance if the problem persists.
- Compatibility Issues: Always use brushes or pad drivers that are compatible with your specific floor scrubber model. Using incompatible brushes can lead to performance issues or even damage to the machine.
Find out the weight specifications of floor scrubber machines and learn how to replace their brushes hassle-free.
Tips for Maintaining Floor Scrubber Brushes
To prolong the life of your floor scrubber brushes and ensure optimal cleaning performance, follow these maintenance tips:
- Regular Cleaning: After each use, remove the brushes and rinse them with clean water to remove any debris or buildup.
- Proper Storage: When not in use, store brushes in a dry, clean area to prevent moisture damage or contamination.
- Inspect Regularly: Periodically inspect the brushes for signs of wear, such as frayed or missing bristles, and replace them as needed.
- Follow Manufacturer Guidelines: Consult your scrubber’s manual for specific maintenance recommendations, including recommended replacement intervals and compatible brush types.
Conclusion
Replacing the brushes on a floor scrubber is a relatively easy task that can be accomplished with the right tools and a bit of know-how. By following the step-by-step guide and troubleshooting tips provided in this comprehensive article, you can ensure your floor scrubber continues to operate at peak efficiency, delivering a thorough and effective clean. Regular brush maintenance not only improves cleaning performance but also extends the life of your valuable equipment, saving you money in the long run. With this knowledge in hand, you can confidently tackle brush replacement and keep your facility looking its best.
FAQs
How often should I replace the brushes on my floor scrubber?
The frequency of brush replacement depends on several factors, including the type of floor surfaces you clean, the amount of use, and the level of debris and dirt. As a general rule, it’s recommended to replace the brushes every 3-6 months or sooner if you notice signs of wear, such as frayed or missing bristles. Consult your scrubber’s manual for specific replacement intervals recommended by the manufacturer.
Can I use any brush replacement on my floor scrubber?
No, it’s crucial to use brush replacements that are compatible with your specific floor scrubber model. Using incompatible brushes can lead to performance issues, uneven wear, or even damage to the machine. Refer to your scrubber’s manual or contact the manufacturer to ensure you purchase the correct brush type and size for your model.
What should I do if the new brushes aren’t spinning correctly after installation?
If the new brushes aren’t spinning correctly, the first step is to double-check that they are installed correctly and appropriately aligned in the brush housing. Ensure no obstructions or debris are preventing the brushes from spinning freely. If the problem persists, consult your scrubber’s manual for troubleshooting steps or seek professional assistance.
How can I extend the life of my floor scrubber brushes?
To maximize the lifespan of your floor scrubber brushes, follow these tips:
- Clean the brushes after each use by rinsing them with clean water to remove debris and buildup.
- Store brushes in a dry, clean area when not in use to prevent moisture damage or contamination.
- Inspect the brushes regularly for signs of wear and replace them as needed.
- Follow the manufacturer’s guidelines for proper brush maintenance and recommended replacement intervals.
Can I replace the brushes on my floor scrubber myself, or should I hire a professional?
In most cases, replacing the brushes on a floor scrubber is straightforward, and you can do it by following the manufacturer’s instructions and the step-by-step guide provided in this article. However, if you’re unsure or encounter any difficulties, it’s always better to seek professional assistance to avoid potential damage to the machine or personal injury. Hiring a professional can also ensure the job is done correctly and efficiently.